Documentation Index
Fetch the complete documentation index at: https://cntxt-32df93f0.mintlify.app/llms.txt
Use this file to discover all available pages before exploring further.
Testing Your Agent
Before publishing your agent to users, it’s important to verify it functions as expected:Using the Preview Panel
- Locate the preview panel on the right side of the agent configuration screen
- Type test messages in the input field to simulate user interactions
- Observe how your agent responds to various queries
- Pay attention to both the content and tone of responses
.png?fit=max&auto=format&n=UZw8CwXbcP9Qy9Sd&q=85&s=2e5106f509d0a6f90ed79256b1658224)
What to Test
When testing your agent, verify:- Knowledge Retrieval: Does the agent correctly access and use information from your knowledge base?
- Tool Integration: Are connected tools (Gmail, Jira, etc.) functioning properly?
- Instruction Adherence: Does the agent maintain the persona and follow guidelines you specified?
- Edge Cases: Test unusual or complex queries to see how the agent handles them
Refining Your Agent
Based on test results:- Adjust your instructions if the agent’s tone or approach needs improvement
- Add or modify knowledge base content if the agent lacks necessary information
- Reconfigure tool settings if they aren’t working as expected
- Test voice interactions if you’ve enabled voice chat
Publishing Your Agent
When you’re satisfied with your agent’s performance, you’re ready to publish:- Click the “Publish” button in the top-right corner of the Playground
- Confirm your deployment method (Website, iFrame, Chat Bubble, API, Slack)
- Review the final settings before deployment
.png?fit=max&auto=format&n=UZw8CwXbcP9Qy9Sd&q=85&s=b4417e7855b8850421217b9c5a296a7e)
Deployment Options
Shipable offers multiple ways to deploy your agent: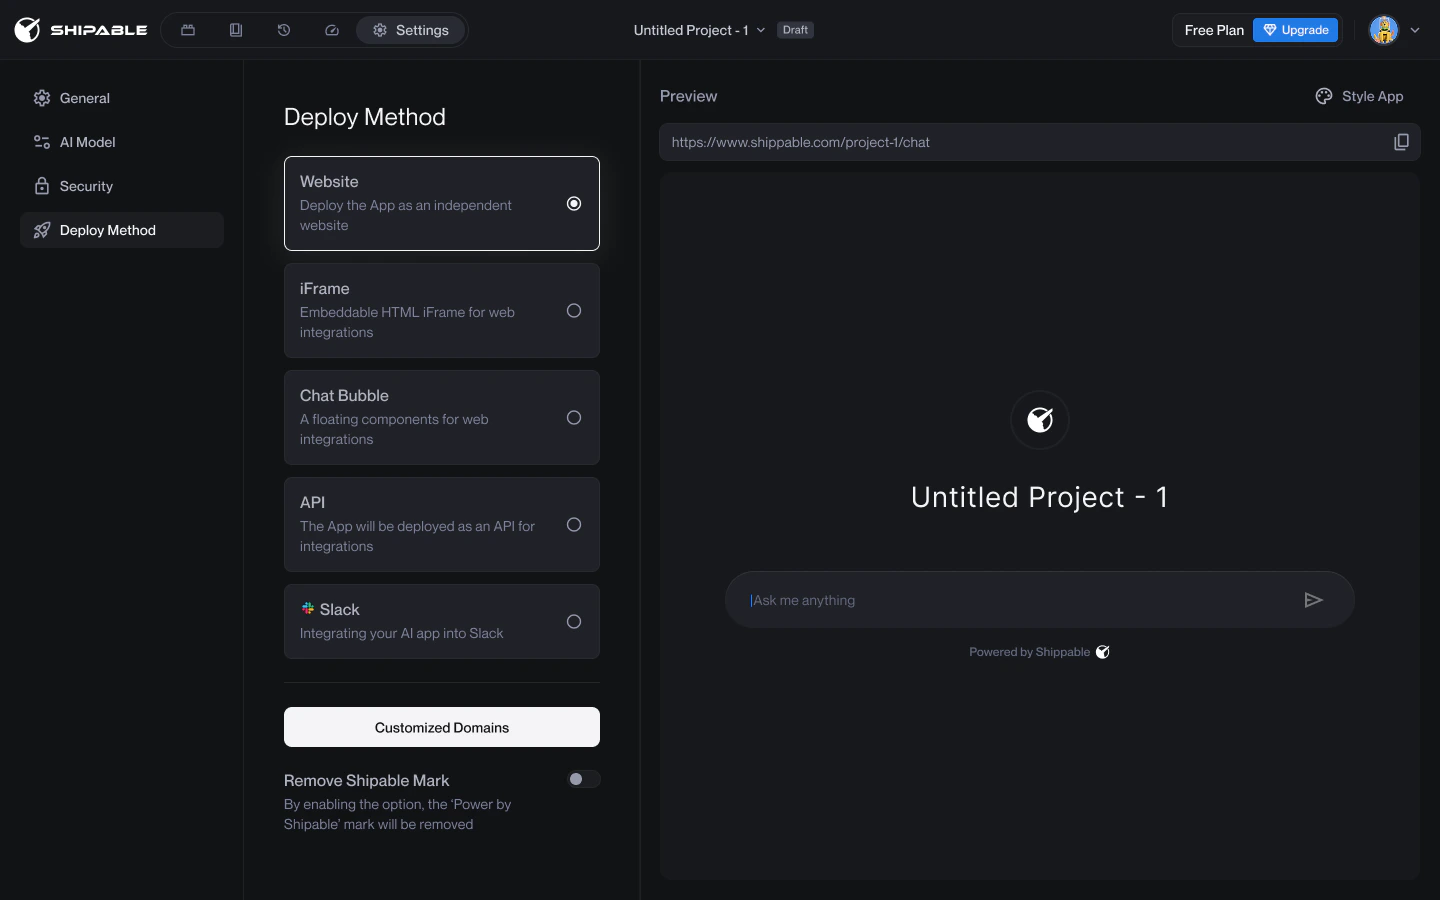
Website Deployment
- Your agent will be accessible via a dedicated URL:
https://www.shipable.com/your-project-name/chat - You can customize the domain for premium plans
iFrame Deployment
- Select the iFrame Code Interface option
- Copy the provided code snippet
- Paste the code into your website’s HTML to embed the agent
Chat Bubble
- Adds a floating chat bubble to your existing website
- Configure appearance settings to match your brand
API
- Access your agent programmatically via API endpoints
- Useful for custom integrations with your own applications
Slack Integration
- Deploy your agent directly to your Slack workspace
- Enable team collaboration with your AI assistant
Managing Deployed Agents
Updating Published Agents
- Return to the Playground to make changes to your agent
- Edit settings, knowledge base, or instructions as needed
- Click “Publish” again to push updates to the live agent
Creating Multiple Versions
For testing different configurations:- Clone your existing agent to create a new version
- Make changes to the new version while keeping the original intact
- Test and publish the new version when ready
Sharing Access
To provide team access to your deployed agent:- Copy the access URL or embed code
- Share with team members or integrate into shared resources